Models Available
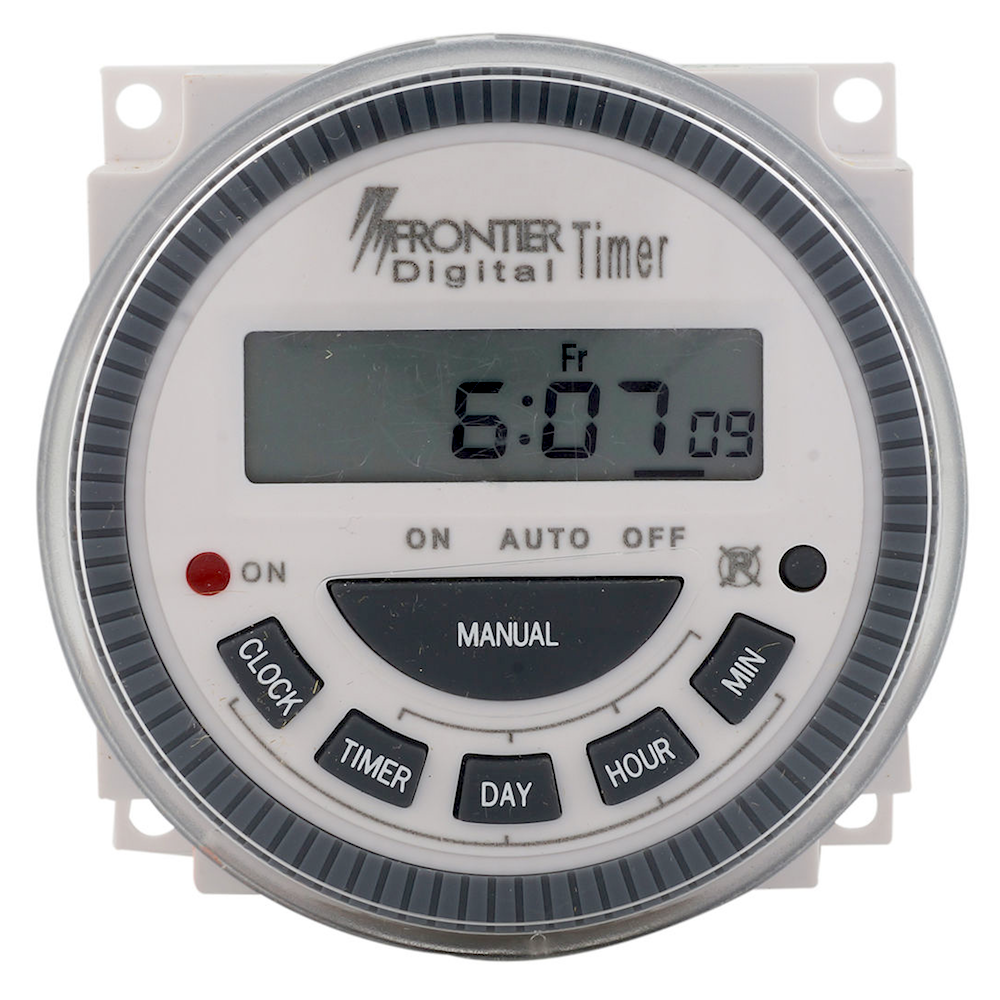
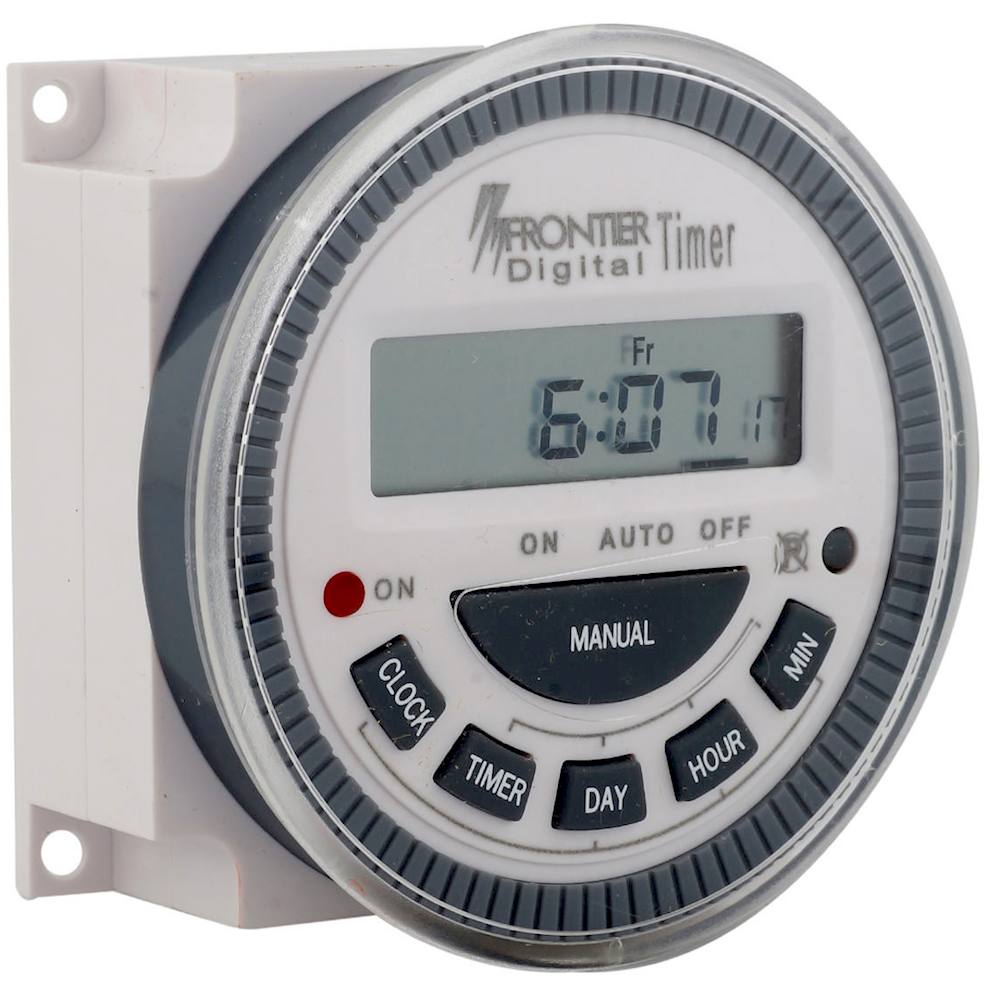
TM619 series is Panel-Mount Digital Timer with the following options
- TM619X-Y: possible value for Y
- -1: 120VAC main supply
- -2: 240VAC main supply (we stock only this type)
- -3: 24VAC/VDC
- -4: 12VDC
- TM619X-Y: possible value for X
- L: Volt Output, 250Vac/16Amp Rating
- H: Volt Output, 250Vac/20Amp Rating
- : Blank ie no Value : Volt-Free contact, 250Vac/16Amp Rating
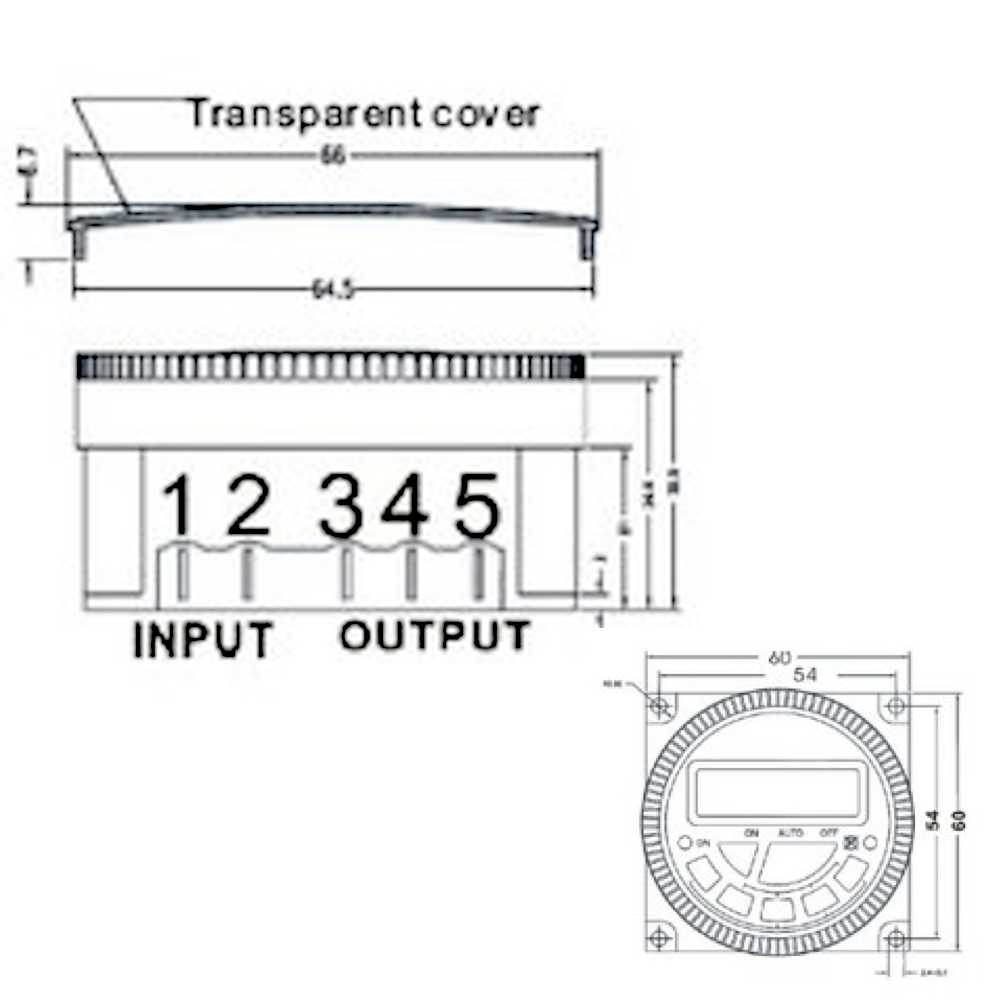
- Output is either volt-free (5PIN) or volt-output (4PIN).
- Battery Backup option to provide programming memory backup.
- Replaceable Lithium CR2032 or
- Rechargeable V80H are equipped with Timer
Models Variation We Sell
We stock the 230VAC option marked in BOLD
- Replaceable Battery
- TM619H-2 (4PIN) / TM619L-2 (4PIN) Click to Buy
- TM619H-2 (5PIN) / TM619L-2 (5PIN) Click to Buy
- Rechargeable Battery
- TM619H-2 (4PIN) / TM619L-2 (4PIN) Click to Buy
- TM619H-2 (5PIN) / TM619L-2 (5PIN)
Download a manual of the product sold by us, the latest / new featured TM619 Timers Latest Manual
Download a old version of the manual, it's still valid but not up to date click here to download old manual
TIMER SWITCH TM619
Programing & Operation
UPDATING DAY/HOUR/MINUTE
Keep CLOCK key pressed, then press:
• DAY: to update the indicated day of week;
• HOUR: to update the indicated hour;
• MIN: to update the indicated minutes.
The terms MO, TU, WE, TH, FR, SA & SU, correspond to the weekdays in English:
MO= Monday; TU= Tuesday; WE= Wednesday; TH= Thursday; FR= Friday; SA=Saturday; SU= Sunday;
Incorrect Programing will render the timer to malfunction, hence please spend time to understanding the functionality of the Timer, before attempting to program.
The programing is Sequential, hence if you set
- 1ON is set to 9:00 and 1OFF is set to 10:00 and if 2ON is set to 9:30 and 2OFF is set to 10:30, what will happen..? the timer will ON at 9:00 and OFF at 10:00, the 2ON and 2OFF has no meaning to the Timer.
- 1ON is set to 9:00 and 1OFF is set to 8:30, what will happen..? the timer will ON at 9:00 and will OFF the next day at 8:30, provided the DAY Program is everyday of the week else will switch OFF the next week on the same DAY at 8:30.
1. Press TIMER key. LCD screen shall show

2. Press DAY key to select any of 15-combination of Daily-Programs to your application demand. on every key press, LCD shall alternatingly indicate the 15-combinations.. as follows
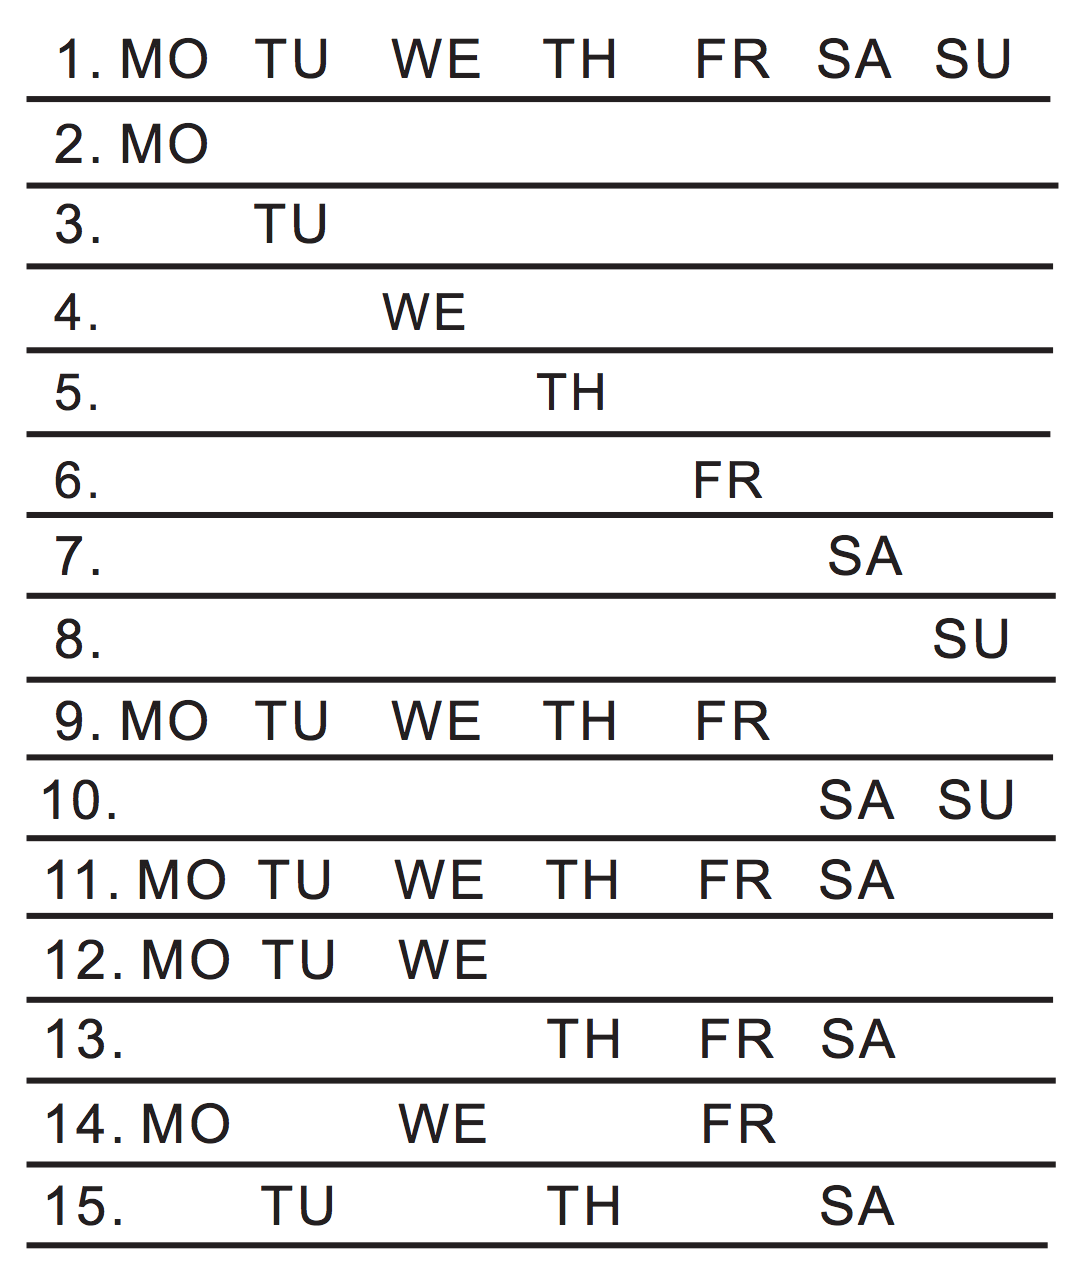
3. Press HOUR key, MIN key respectively to set desired HOUR and MINUTE for 1ON ; after finished setting of 1ON
4. Press TIMER key again, LCD screen shall show

5. Press DAY key to select any of 15-combination of Daily-Programs to your application demand. on every key press, LCD shall alternatingly indicate the 15-combinations..
6. Press HOUR key, MIN key respectively to set desired HOUR and MINUTE for 1OFF ; after finished setting of 1OFF
7. Press TIMER key again, LCD screen shall show

8. Repeat procedure stated on 1~6 to complete rest of ON / OFF program-period (event) or just to the desired number of ON/OFF (event)
9.When finished program-setting (event), press CLOCK key, to exit the Schedule Time Programing mode.
Timer is now ready to execute schedule ON / OFF programs.
How to use the Timer
When the BAR is Above
- ON: The Timer will Switch ON the Load
- AUTO: The Timer Switch ON or OFF as per programed Schedule
- OFF: The Timer Remains in OFF mode.
FROM ON TO OFF OVERRIDE: When Timer’s output status is “ON” Pressing MANUAL key, to move indicator (BAR) from “ AUTO “ to “ OFF”, Timer output shall turn to “ OFF” status, Pressing again to switch Timer status to “ AUTO “, Timer’s output shall continue maintaining “OFF“ But Timer shall resume its automatic operation when next schedule program (event) calls for “ON“.
FROM OFF TO ON OVERRIDE: When Timer’s output status is “ON” Pressing MANUAL key, to move indicator (BAR) from “ AUTO “ to “ OFF”, Timer output shall turn to “ OFF” status, Pressing again to switch Timer status to “ AUTO “, Timer’s output shall continue maintaining “OFF“ But Timer shall resume its automatic operation when next schedule program (event) calls for “ON“.
Example of FROM ON TO OFF OVERRIDE: If the Timer schedule is 1-On is 7:00 and Timer 1-Off is 10:00, the timer will ON at 7:00, hence at any time before 10:00 if you want to "OFF" but want the timer to continue the AUTO Mode for the next timer schedule on event, then do the following
- Press "MANUAL" to move the indicator (BAR) from “ AUTO “ to “ OFF”
- wait till the output is offed then
- again Press "MANUAL" to move the indicator (BAR) from “ OFF “ to “AUTO”.
Example of FROM OFF TO ON OVERRIDE: If the Timerschedule is 1-On is 7:00 and Timer 1-Off is 10:00, but at 5:00 if you want the timer to ON but still want the timer to OFF at 10:00 and also to continue the AUTO Mode for the next timer event, then do the following
- Press "MANUAL" to move the indicator (BAR) from “ AUTO “ to “ ON”
- wait till the output is ON then
- again Press "MANUAL" to move the indicator (BAR) from “ ON “ to “AUTO”.
The CR2032 battery is available at any medical shop, they sell it as “Accu Chek” (diabetic Meter) Glucometer Battery. Please buy Good Quality Battery, cause there are lots of duplicate in the market, Good Brands are Panasonic, Duracell, Maxell, etc
If you are not using the timer for long period of time, then to save / increase battery life, Press “DAY” and “HOUR” together till the display LCD is Off. To use the timer again, Just Reset the TIMER by inserting a pen tip in the hole marked ![]()
After testing the cable with crimped spade connectors, carry out the following test to check the programming
1. Reset the Timer, by inserting a Pen in the hole ![]()
2. Connect & PIN1 (Neutral) &PIN2 (Phase) with 230V AC
3. check timer with Manual "ON" and "OFF"
-- Press the MANUAL button to ON (the relay should ON) and
-- Press MANUAL button to OFF (the relay should OFF)
-- * -- if you hear the click of the relay and RED LED Lights up but load not switching on? check the load side wiring
-- * -- if the RED LEDS does not light up but not the load? then once again check if PIN1 & PIN2 is getting the Power (issues with crimping of wire; use a test lamp to check the crimping)
4. Program 1-ON for All days of the week and 00:10
-- Press TIMER key
-- Press DAY key Once and
-- Press MIN key till 00:10 is displayed on LCD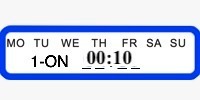
5. Program 1-OFF for All days of the week and 00:15
-- Press TIMER key
-- Press DAY key Once and
-- Press MIN key till 00:15 is displayed on LCD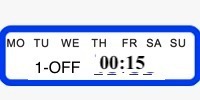
6. Press CLOCK key
7. to Check the programing "Press the MANUAL key" till the BAR is on top of AUTO (underline above AUTO)
The timer should ON at 00:10 and OFF at 00:15,
Video in Other Languages
UPDATING “दिन / घंटे / मिनट तैयार करना”
CLOCK बटन को दबाए रखें , फिर दबायें
• DAY: दिन: सप्ताह के संकेतित दिन को अपडेट करने के लिए
• HOUR: घंटे: संकेतित घंटे को अपडेट करने के लिए
• MIN: मिनट: संकेतित मिनटों को अपडेट करने के लिए
The terms (प्रतीक) MO, TU, WE, TH, FR, SA & SU, अंग्रेजी में सप्ताह के दिनों के अनुरूप
MO= सोमवार; TU= मंगलवार; WE= बुधवार; TH= गुरुवार; FR= शुक्रवार; SA= शनिवार; SU= रविवार;
1. “TIMER” बटन दबाएं। एलसीडी स्क्रीन दिखाएगा

2. “DAY” बटन दबाएं। दैनिक – 15 कार्यक्रमों का संयोजन में से चयन करें : हर बटन प्रेस पर, एलसीडी बारी-बारी से 15-संयोजनों के बीच संकेत देगा। 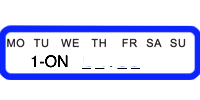
सप्ताह के प्रत्येक दिन के लिए चयन करें
3. HOUR बटन या MIN बटन दबाएं, 1ON के लिये, आवश्यक घंटे और मिनट सेट करें ; 1ON की सेटिंग समाप्त होने के बाद

5. "DAY" बटन दबाएं। दैनिक - 15 कार्यक्रमों का संयोजन में से चयन करें : हर बटन प्रेस पर, एलसीडी बारी-बारी से 15-संयोजनों के बीच संकेत देगा।
6. HOUR बटन या MIN बटन दबाएं, 1OFF के लिये, आवश्यक घंटे और मिनट सेट करें ; 1OFF की सेटिंग समाप्त होने के बाद
7. TIMER टाइमर बटन फिर से दबाएं, एलसीडी स्क्रीन दिखाएगा

8. कार्यक्रम / अवधि के बाकी को पूरा करने के लिए रिपीट करते रहें, 1 ~ 6 पर बताई गई प्रक्रिया
9. जब आवश्यक प्रोग्राम-सेटिंग को पूरा हो गई, अनुसूची समय कार्यक्रम मोड से बाहर निकलने के लिए CLOCK बटन दबाएँ।

I have purchase your TM 619 L timer 5 pin I am not able to connect so please send me hindi manual for sating.
http://bit.ly/tm619manual video also provide in Hindi & English, follow the Hind Video कृपया हिंद वीडियो का पालन करें
I have purchased TM 619 timer and want to connect it for my 3.5 ampere rating water pump. Shall I supposed to use contactor or can directly connect. Please guide me detailed wiring connections.
250 watt led light 12 pic & contactor & this timer how connect control lighting system
Hi, i have purchased a T.M 619, i need to start the motor at 1 and half an hour interval for 30 seconds everyday each time. Can you please suggest me how to set the program in the timer. Thanks
see the video “SET THE TIMER to AUTO ON & OFF the Scheduled Timing” above, please note the min interval is 1MIN (60SEC), this timer does not 30SEC SCHEDULE
Frontier TM 619 ZIN 4P ECO FSH
CR 2032 CELL
DATE of purchase14 JUN 2019
Not holding the time settings. Clock get reset programing also get disturbed. Request suggestions.
Joseph 9494884739
please change the battery, CR2032 (also available in medical shop, ask of battery for Accu Check – diabetic meter)
Send circuit diagram for 1.5 hp submersible water pump with TM-619H-2 Timer switch , i purchased this
Please contact 82174 87594 on whatsapp for customisations / support
Sir I buy your timmer And replace Battery also but once electricity gone timer all data was deleted.kindly suggest what Will do. Plz send reply in hindhi
Dear Mufaddal, the reset of the timer happens when battery is low, which battery you have purchased.. ? pls buy good quality battery, above 35RS “टाइमर का रीसेट तब होता है जब बैटरी कम हो, आपने कौन सी बैटरी खरीदी है ..? pls अच्छी गुणवत्ता वाली बैटरी खरीदें, 35RS से ऊपर”
I have purchased TM 619H2 …the data gets erased once mains switch turned off.. it seems the rechargeable battery is not working.. how to repkace this rechargeable battery?
please watch the english and hindi tutorials section “BATTERY CHANGE (REPLACE THE CR2032)”
Sir I have purchased your product it worked for some days then due to voltage fluctuation it now shows only time but not giving output also red light not coming on, where can I repair your product on Mumbai give me address and contact no.
Dear df/;
q
Dear Mario,
these are COB, no repairable parts,
at times, the power supply section can be repaired by local TV mechanics, ask him to change the X2 Capacitor
Sir I have got a refund back for my and also purchased another one , but will try to repair it by a TV mechanic , thanks for the advice.
how to set desired time like, in mobiles there is timer option there and i can set 10 mins and start the timer, after 10 min it will stop. can i set same timer in frontier TM-619-2 (5pin) model…?
its called count down feature, we have both manual count down and scheduled count down
I had purchased TM-619H during September 2019. Timer has failed due to flashover of capacitor. Dealer replied that there is no warranty for the same. I want to replace the burnt capacitor. Are the spares & PCB layout available? Please confirm.
u can buy the X2 cap at the local electronic spares shop in ur city, please not when a flash happens there can be other parts also gone bad, hence its not worth trying to repair the timer
Could you pl send me the mounting box / unit price for TM-619H-2
I sent my query on 9th May 2022 on your WA no. 8217487594. Kindly respond to the same.